When I think of moments that coax me into the kitchen, I recall the day I made Cheesecake Brownies for the very first time. It was a rainy afternoon, the kind that urges you to seek comfort in the form of delightful treats. I had friends coming over, but I wanted to serve something extraordinary — something that merged the richness of chocolate with the decadence of cheesecake. Thus, my journey into the blissful creation of Cheesecake Brownies began.
As the scent of melted butter and cocoa wafted through the kitchen, I felt an immediate warmth envelop me that can only come from crafting something delicious with my own hands. These brownies don’t just deliver on flavor; they come with the added element of creamy cheesecake that sends your taste buds into a frenzy. It’s a sweet little dream wrapped in chocolate, and I can’t wait for you to make it!
Recipe Timing
- Prep Duration: 15 minutes
- Active Cooking: 35 minutes
- Total Duration: 50 minutes
- Portion Size: 16 squares
- Complexity: Moderate
Nutritional Recipe
- Calories per portion: Approximately 200 calories
- Protein: 3g
- Carbs: 25g
- Fats: 10g
- Fiber: 1g
- Sugars: 16g
- Sodium: 120mg
Why You’ll Love This Cheesecake Brownies
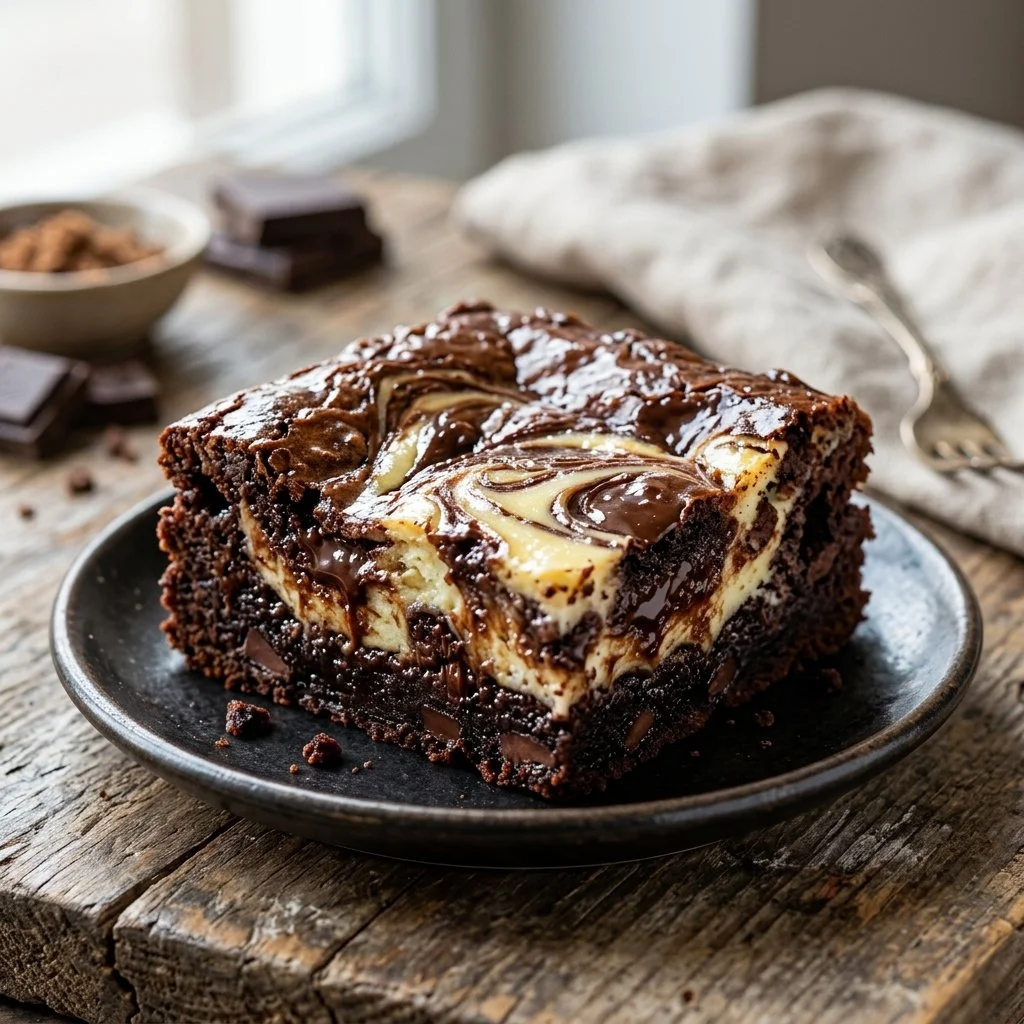
Imagine sinking your fork into a chewy brownie, only to discover a luscious swirl of creamy cheesecake that complements its fudgy texture perfectly. What’s more, these Cheesecake Brownies are a delightful mix of two desserts that feel indulgent but are straightforward to make. Whether you’re serving them at a gathering or enjoying a quiet evening at home, they’re sure to win hearts and satisfy sweet cravings.
The Complete Cooking Journey
Creating these Cheesecake Brownies is simple yet rewarding. You’ll start with melting butter and stirring in sugar for that classic brownie base. Next, after blending eggs and dry ingredients, the magic happens when you layer the cheesecake mixture. The final touch? Swirling the brownie batter to create an eye-catching marbled effect that makes every bite an experience.
Ingredients:
- 1/2 cup unsalted butter
- 1 cup sugar
- 1 teaspoon vanilla extract
- 2 large eggs
- 1/3 cup unsweetened cocoa powder
- 1/2 cup all-purpose flour
- 1/4 teaspoon salt
- 1 (8 ounce) package cream cheese
- 1/4 cup powdered sugar
- 1 egg
Method:
Step 1: Preheat the Oven and Prepare the Pan
Preheat the oven to 350°F (175°C) and grease a 9×9 inch baking pan to ensure that your brownies come out smoothly.
Step 2: Melt the Butter
In a medium saucepan, melt the butter over low heat. Remove from heat and stir in sugar along with 1 teaspoon of vanilla extract, letting the flavors meld.
Step 3: Add the Eggs
Incorporate the eggs one at a time into the mixture, mixing well after each addition. This is pivotal for ensuring a rich texture.
Step 4: Combine Dry Ingredients
Stir in the cocoa powder, flour, and salt until just combined. You don’t want to overmix, as we’re aiming for chewy brownies.
Step 5: Prepare the Cheesecake Mixture
In a separate bowl, beat the cream cheese with powdered sugar and 1 egg until smooth. This creamy blend is what elevates your brownies to decadence.
Step 6: Layer the Brownie Batter
Pour half of the brownie batter into the prepared pan and spread it evenly. This forms the delicious base.
Step 7: Add the Cream Cheese Mixture
Spread the cheesecake mixture over the brownie batter evenly. Don’t be shy — this layer is what makes your brownies so special!
Step 8: Add Remaining Brownie Batter
Pour the remaining brownie batter on top of the cheesecake layer, ensuring coverage.
Step 9: Create a Marbled Effect
Using a knife, gently swirl through the batter to create a marbled effect. This not only looks stunning but also mixes flavors brilliantly.
Step 10: Bake
Bake for 30-35 minutes, or until a toothpick inserted comes out with a few moist crumbs. Your kitchen will smell heavenly by now!
Step 11: Cool and Slice
Let the brownies cool before slicing them into squares. This waiting period is crucial for achieving perfect slices.
Serving Suggestions & Pairings
These Cheesecake Brownies shine on their own but are equally delightful with a scoop of vanilla ice cream or a dollop of whipped cream. Pair with a cup of coffee or a glass of milk for the ultimate treat experience!
Storage & Leftovers Guide
Store leftover brownies in an airtight container at room temperature for up to 3 days or in the fridge for up to a week. You can also freeze them for up to 3 months — a delicious future treat awaits!
Kitchen Wisdom & Success Tips
- Use room temperature cream cheese to ensure smooth blending into the batter.
- Be careful not to overbake for that fudgy texture.
- Swirling is an art; don’t stress! Embrace the imperfect designs.
Flavor Variations & Adaptations
- Add nuts for a crunchy contrast. Walnuts or pecans work beautifully here.
- Swap the cream cheese for flavored varieties like chocolate or raspberry for a twist.
- Add a sprinkle of sea salt on top before baking for a delightful contrast to the sweetness.
Reader Questions & Solutions
-
Can I use margarine instead of butter?
- Yes, margarine or a butter substitute can work, but it may alter the flavor slightly.
-
How do I know when the brownies are done?
- They should be set at the edges with a slight jiggle in the center. A toothpick should come out with a few moist crumbs.
-
Can I make these brownies gluten-free?
- Absolutely! Just substitute the all-purpose flour with a gluten-free blend.
-
Is it okay to leave out the cheesecake layer?
- Yes! You can enjoy these as traditional brownies by not adding the cheesecake layer.
-
What can I do if my brownies turn out dry?
- Try reducing the baking time slightly next time or add a touch more butter to compensate.
Wrapping Up
As you embark on creating these delightful Cheesecake Brownies, remember that baking is as much about the journey as it is about the destination. Embrace the process, enjoy the aromas, and most importantly, share these treats with loved ones. Every bite tells a sweet story, and I can’t wait for yours to unfold!
PrintCheesecake Brownies
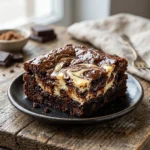
Indulge in the rich chocolate flavor of brownies combined with a creamy cheesecake swirl for a decadent treat.
- Prep Time: 15 minutes
- Cook Time: 35 minutes
- Total Time: 50 minutes
- Yield: 16 squares 1x
- Category: Dessert
- Method: Baking
- Cuisine: American
- Diet: Vegetarian
Ingredients
- 1/2 cup unsalted butter
- 1 cup sugar
- 1 teaspoon vanilla extract
- 2 large eggs
- 1/3 cup unsweetened cocoa powder
- 1/2 cup all-purpose flour
- 1/4 teaspoon salt
- 1 (8 ounce) package cream cheese
- 1/4 cup powdered sugar
- 1 egg
Instructions
- Preheat the oven to 350°F (175°C) and grease a 9×9 inch baking pan.
- Melt the butter over low heat in a medium saucepan, then stir in sugar and vanilla extract.
- Add the eggs one at a time, mixing well after each addition.
- Combine the cocoa powder, flour, and salt until just mixed.
- Prepare the cheesecake mixture by beating cream cheese with powdered sugar and 1 egg until smooth.
- Layer half of the brownie batter into the prepared pan.
- Add the cheesecake mixture over the brownie batter.
- Pour the remaining brownie batter on top.
- Create a marbled effect by swirling through the batter with a knife.
- Bake for 30-35 minutes until a toothpick comes out with a few moist crumbs.
- Cool the brownies before slicing them into squares.
Notes
Use room temperature cream cheese for smooth blending and avoid overbaking for a fudgy texture.
Nutrition
- Serving Size: 1 square
- Calories: 200
- Sugar: 16g
- Sodium: 120mg
- Fat: 10g
- Saturated Fat: 6g
- Unsaturated Fat: 4g
- Trans Fat: 0g
- Carbohydrates: 25g
- Fiber: 1g
- Protein: 3g
- Cholesterol: 30mg