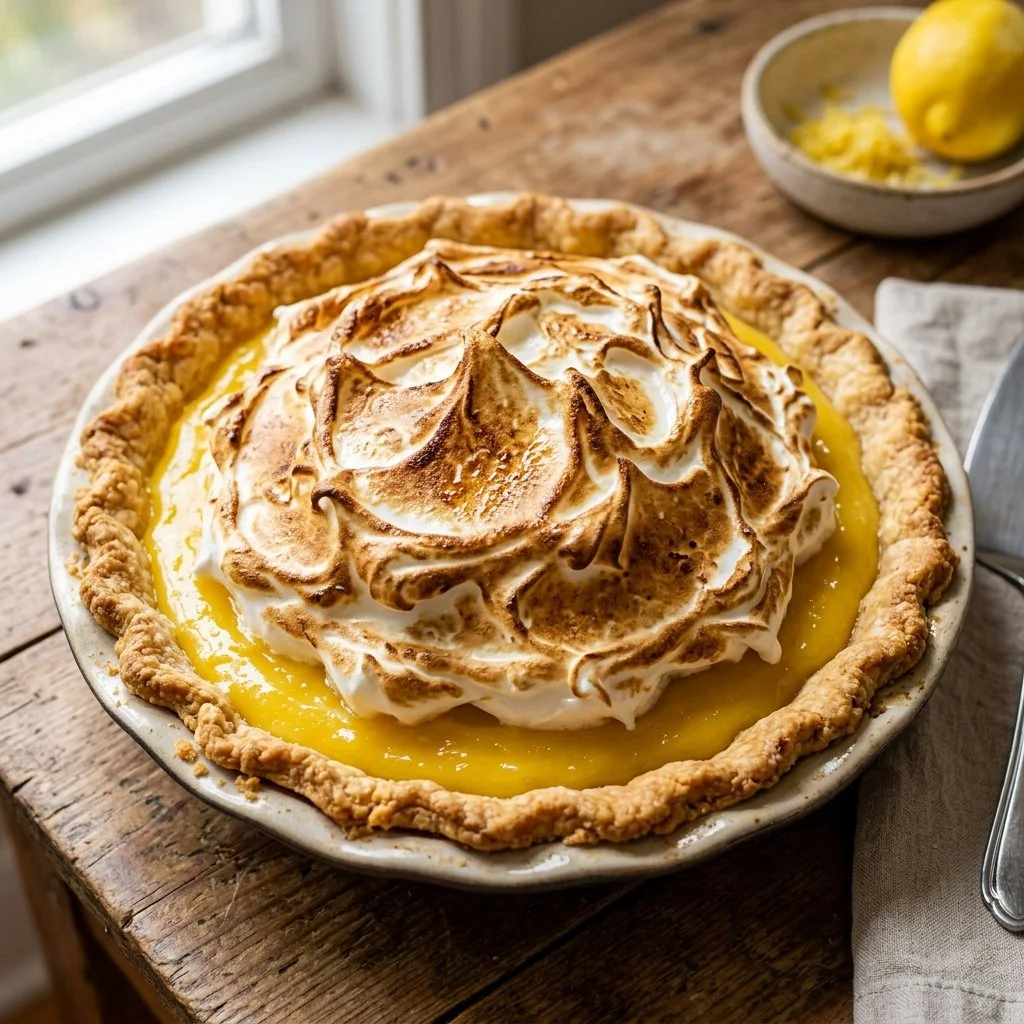
There’s something incredibly joyful about biting into a slice of Lemon Meringue Pie. It evokes memories of summer picnics, family gatherings, and sunny afternoons spent with friends. For me, this dessert has always held a particular charm, drawing me in with its bright, zesty flavor and that ethereal, cloud-like meringue topping. My grandmother used to make it every holiday, and watching her whip those egg whites until they formed perfect peaks was nothing short of magical. There’s an art to it, one that I’ve promised to carry forward, and today, I’d like to share this classic recipe with you.
Recipe Timing
- Prep Duration: 20 minutes
- Active Cooking: 30 minutes
- Total Duration: 50 minutes (plus cooling time)
- Portion Size: Serves 8
- Complexity: Moderate
Nutritional Recipe
- Calories per portion: Approximately 350
- Protein: 5g
- Carbs: 55g
- Fats: 15g
- Fiber: 0g
- Sugars: 30g
- Sodium: 120mg
Why You’ll Love This Lemon Meringue Pie
This Lemon Meringue Pie isn’t just a treat for the eyes — it’s a burst of flavor that can brighten any day. The combination of tangy lemon filling, rich buttery crust, and fluffy meringue creates a symphony of tastes and textures. The sugar balances the tartness of the lemons, while the meringue provides a delightful contrast that melts in your mouth. Each bite transports you to a summer garden, proving that even in the depths of winter, a slice of this pie can breathe warmth and sunshine into your home.
The Complete Cooking Journey
Let’s join in this flavorful journey from start to finish as we bring this delightful Lemon Meringue Pie to life.
Ingredients:
- 1 pie crust (store-bought or homemade)
- 1 cup sugar
- 1/4 cup cornstarch
- 1/4 teaspoon salt
- 1 1/2 cups water
- 3 large egg yolks
- 1/4 cup unsalted butter
- 1/2 cup freshly squeezed lemon juice
- 1 tablespoon lemon zest
- 3 large egg whites
- 1/4 teaspoon cream of tartar
- 1/2 cup sugar (for meringue)
Method:
Step 1: Preheat the Oven
Preheat your oven to 350°F (175°C). This ensures that your pie crust has the perfect environment to bake evenly.
Step 2: Prepare the Filling Base
In a saucepan, combine 1 cup of sugar, 1/4 cup of cornstarch, and 1/4 teaspoon of salt. Gradually whisk in 1 1/2 cups of water until the mixture is smooth and lump-free.
Step 3: Thicken the Mixture
Cook over medium heat, stirring constantly, until the mixture thickens and comes to a gentle boil. This should take about 5-10 minutes. Keep an eye on it; you want it thickened, not burnt!
Step 4: Temper the Egg Yolks
In a separate bowl, whisk the 3 large egg yolks. To temper them and prevent cooking them too quickly, add a small amount of the hot mixture into the yolks while whisking vigorously. Once combined, return everything to the saucepan and cook for another 2 minutes.
Step 5: Add Lemon Goodness
Remove from heat and stir in 1/4 cup of unsalted butter, 1/2 cup of freshly squeezed lemon juice, and 1 tablespoon of lemon zest. The mixture should smell unbelievably fresh now! Pour this luscious filling into the pre-baked pie crust.
Step 6: Whip the Egg Whites
In a clean bowl, beat the 3 large egg whites with 1/4 teaspoon of cream of tartar until soft peaks form. Gradually add 1/2 cup of sugar and continue to beat until stiff peaks form. This step is crucial for achieving that perfect meringue texture.
Step 7: Meringue Perfection
Spread the meringue over the lemon filling in the pie shell, making beautiful peaks and swirls. This is your chance to get creative!
Step 8: Bake the Meringue
Bake for 10-12 minutes or until the meringue is golden brown. Keep an eye on it; you want that beautiful color without burning it.
Step 9: Cool Before Serving
Let the pie cool completely before slicing into it. This might be the hardest part, but it’s worth the wait!
Serving Suggestions & Pairings
Lemon Meringue Pie is perfectly refreshing on its own, but consider serving it with a dollop of whipped cream or a scoop of vanilla ice cream. A light cup of herbal tea or a glass of iced lemonade pairs beautifully, enhancing that citrusy zing.
Storage & Leftovers Guide
This pie can be stored in the refrigerator, loosely covered, for up to 3 days. However, meringue may start to weep over time, so it’s best enjoyed fresh!
Kitchen Wisdom & Success Tips
- For a perfectly baked meringue, make sure your mixing bowl and beaters are completely clean and dry.
- When tempering the egg yolks, it’s crucial to mix in the hot mixture slowly to avoid scrambling them.
- Always allow the pie to cool thoroughly before serving to prevent a soupy filling.
Flavor Variations & Adaptations
Feel free to experiment! Add a touch of lime or orange juice to the lemon filling for a citrus medley. You could even incorporate fresh berries into the pie for a pop of color.
Reader Questions & Solutions
-
What if my meringue doesn’t form stiff peaks? Sometimes it’s a matter of your egg whites not being fresh enough. Make sure they’re at room temperature and that no yolk gets into the whites.
-
Can I make the pie crust ahead of time? Absolutely! You can prepare your crust a day in advance, just keep it wrapped and stored in the fridge.
-
How do I prevent the filling from becoming watery? Be sure to cook the filling until it is thickened before adding it to the pie crust.
-
Can I freeze the pie? While it’s best fresh, you can freeze it without the meringue for a later date. Just add the meringue and bake after thawing.
-
Is there a vegan alternative to the meringue? You can use aquafaba (the liquid from canned chickpeas) whipped with sugar for a vegan meringue alternative!
Wrapping Up
The world of delicious desserts is vast, but a classic Lemon Meringue Pie holds a beloved place in our hearts and on our tables. Whether you’re making it for a special occasion or just because, this pie is a testament to the joy of baking and sharing. Embrace the process, enjoy the flavors, and don’t forget to share this slice of joy with someone you love. Happy baking!